
Choosing the right air compressor for car painting is crucial for achieving professional-quality results. Whether you’re a DIY enthusiast or a professional auto body technician, understanding compressor specifications will save you time, money, and frustration. This comprehensive guide will walk you through everything you need to know about selecting the perfect air compressor size for your car painting projects.

Why Compressor Size Matters for Car Painting
Using an undersized air compressor for car painting leads to frustrating problems that can ruin your paint job. When your compressor can’t deliver sufficient air volume, you’ll experience inconsistent spray patterns, orange peel texture, and poor paint adhesion. These issues occur because paint guns require a steady stream of compressed air at specific pressure levels to atomize paint properly.
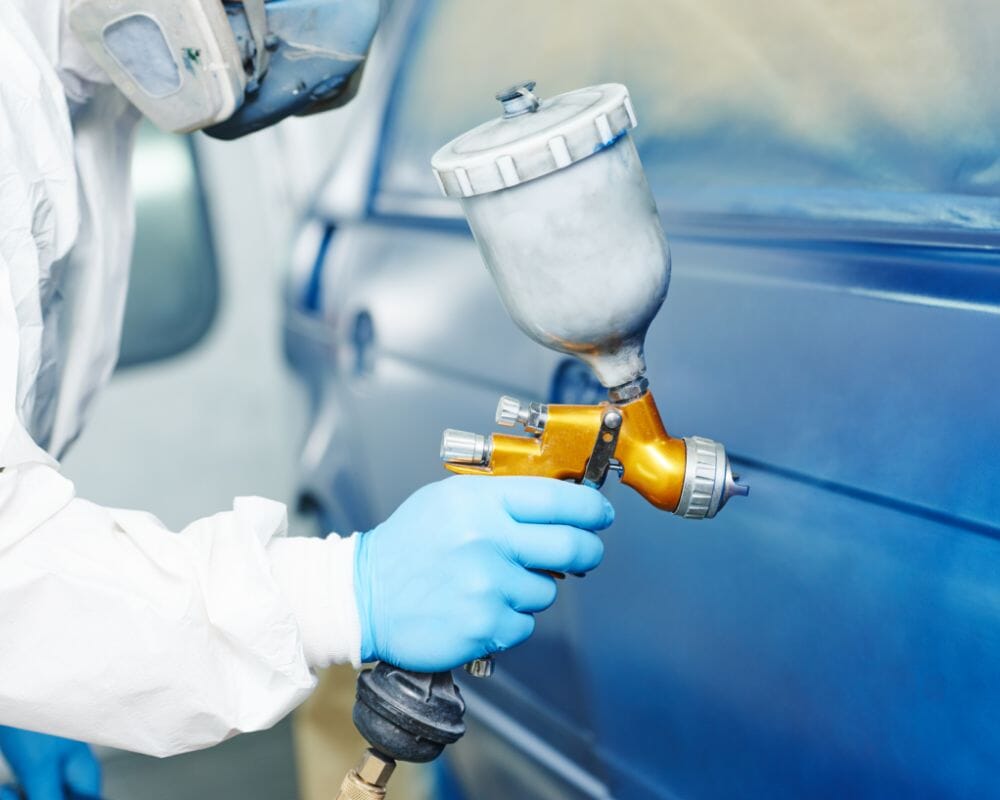
What does an air compressor do in a car painting setup? It powers your spray gun by delivering pressurized air that breaks paint into fine particles for smooth application. Without adequate compressor capacity, you’ll face constant pressure drops, forcing you to stop and wait for the tank to refill. This interruption creates visible overlaps and texture inconsistencies in your paint finish.
Professional auto painters know that investing in the right compressor size prevents these problems and ensures a flawless finish every time. The consequences of using an undersized compressor include wasted materials, extended project time, and potentially expensive repainting jobs.
Understanding CFM vs PSI for Auto Painting
When selecting an air compressor for car painting, you’ll encounter two critical specifications: CFM (Cubic Feet per Minute) and PSI (Pounds per Square Inch). Understanding the difference between CFM vs PSI is essential for making the right choice.
PSI measures air pressure – the force at which air is delivered from your compressor. Most spray guns operate between 25-50 PSI, depending on the type and manufacturer recommendations. Higher PSI doesn’t necessarily mean better performance; it’s about maintaining consistent pressure throughout your painting session.
CFM, on the other hand, measures air volume – the amount of air the compressor can deliver at a specific pressure. This is arguably the most important factor for car painting. Even if your compressor can deliver high PSI, if it can’t sustain sufficient CFM, your spray gun will starve for air when the tank depletes.
The relationship between PSI vs CFM is crucial: as PSI increases, CFM typically decreases. This is why manufacturers provide CFM ratings at specific PSI levels (e.g., “10 CFM at 40 PSI”). For car painting, you need a compressor that can deliver the required CFM at your spray gun’s operating pressure.
To calculate your needs, you can use this simple formula: CFM = (PSI × Tank Volume) / (Time to fill × 7.48). However, most professionals recommend selecting a compressor that delivers at least 50% more CFM than your spray gun requires to ensure consistent performance without constant cycling.
Minimum Requirements for Car Painting Compressors
CFM Requirements by Spray Gun Type
Different spray guns have varying air consumption rates. Here are the typical CFM requirements for common spray gun types:
- HVLP (High Volume Low Pressure): 10-15 CFM @ 40 PSI
- HVLP guns are popular for automotive painting because they transfer more paint to the surface (up to 65% efficiency) and reduce overspray. They require moderate CFM but operate at lower pressures.
- LVLP (Low Volume Low Pressure): 5-10 CFM @ 25 PSI
- LVLP guns are even more efficient than HVLP, with transfer rates up to 85%. They’re ideal for smaller compressors and touch-up work but may require more passes for full coverage.
- Conventional: 15-25 CFM @ 50 PSI
- Conventional spray guns deliver paint at higher pressures but create more overspray. They’re less common in modern automotive painting due to environmental regulations and material waste.
Tank Size Recommendations
Tank size determines how long you can paint before the compressor needs to restart. Here are the minimum recommendations:
- Minimum 20 gallons for small panels: Suitable for painting bumpers, mirrors, or small touch-up areas. A 20-gallon tank allows for about 30-60 seconds of continuous spraying before the motor restarts.
- 60+ gallons for full cars: Essential for painting entire vehicles. A 60-gallon tank provides 2-3 minutes of continuous spraying, giving you enough time to complete a panel or section without interruption.
Larger tanks (80+ gallons) are ideal for professional shops where multiple painters might work simultaneously or for commercial applications requiring continuous operation.
Horsepower Considerations
Horsepower (HP) indicates the power of the compressor motor. While not the most critical factor, it influences recovery time and overall performance:
- 1.5-3 HP for hobbyists: Suitable for occasional use and smaller projects. These compressors typically have smaller tanks and lower CFM ratings but are more affordable and portable.
- 5+ HP for professional shops: Necessary for daily use and larger projects. Professional-grade compressors feature higher CFM output, faster recovery times, and are built for continuous operation.
Remember that HP alone doesn’t determine performance – a well-designed 3 HP compressor can outperform a poorly engineered 5 HP model. Always prioritize CFM ratings over HP when making your selection.
Air Compressor CFM Chart for Auto Painting
This air compressor CFM chart provides quick reference for selecting the right compressor based on your project type:
| PROJECT TYPE | MIN CFM | MIN TANK SIZE | PSI | RECOMMENDED HP |
|---|---|---|---|---|
| Small panels | 5–8 CFM | 20 gal | 40 PSI | 1.5 HP |
| Full car | 10–15 CFM | 60 gal | 50 PSI | 3 HP |
| Commercial | 15+ CFM | 80+ gal | 90 PSI | 5+ HP |
For CFM for spray painting applications, always choose a compressor that exceeds your spray gun’s requirements by at least 30%. This buffer ensures consistent performance even during extended painting sessions and accounts for air leaks or other system inefficiencies.
Best Air Compressors for Car Painting
Top Picks for Home Garages
- California Air Tools 8010 Ultra Quiet
- Specs: 8.0 CFM @ 40 PSI, 10-gallon tank, 1.0 HP
- Why it’s good: Exceptionally quiet (60 decibels), oil-free pump, and portable design make it perfect for hobbyists working in home garages.
- Industrial Air ILA3606056
- Specs: 11.5 CFM @ 40 PSI, 60-gallon tank, 3.7 HP
- Why it’s good: Vertical design saves space, cast iron construction for durability, and sufficient CFM for full car painting projects.
Top Picks for Home Garages
- Quincy QT-54 Splash Lubricated Reciprocating Air Compressor
- Specs: 15.4 CFM @ 40 PSI, 60-gallon tank, 5 HP
- Why it’s good: Industrial-quality construction, low RPM pump for longevity, and reliable performance for daily professional use.
- Ingersoll Rand 2475N7.5V
- Specs: 24.8 CFM @ 90 PSI, 80-gallon tank, 7.5 HP
- Why it’s good: Two-stage pump for maximum efficiency, cast iron construction, and high CFM output for commercial applications or multiple spray guns.
These best auto air compressors represent the best air compressor for painting cars in their respective categories. When selecting, consider your specific needs, available space, and budget constraints.
Essential Accessories for Auto Painting
Air Filters and Dryers
Moisture is the enemy of quality paint jobs. An air compressor filter painting system removes water, oil, and contaminants from your compressed air. Invest in a two-stage filter system: a general purpose filter at the compressor and a coalescing filter near the spray gun for maximum protection.
Hoses and Fittings
Use 3/8″ or 1/2″ ID hoses rated for at least 300 PSI to minimize pressure drop. Avoid long hoses (keep under 50 feet) and use quick-connect fittings with high flow rates. Proper air compressor filter painting setup ensures consistent air delivery to your spray gun.
Hoses and Fittings
Install a quality regulator with a large gauge at the compressor and another at the spray gun. This allows you to set system pressure at the compressor and fine-tune pressure at the gun for optimal atomization. Digital gauges provide more precise readings than analog versions.
Step-by-Step Setup Guide
Preparing Your Compressor
- Place the compressor on a level surface away from the painting area to minimize contamination.
- Install proper plumbing with drains at each low point to remove moisture.
- Set the regulator to 90-100 PSI at the compressor (this gives you room to adjust at the gun).
- Break in new compressors according to manufacturer instructions before painting.
Testing Spray Patterns
- Adjust your spray gun to the manufacturer’s recommended pressure (typically 25-50 PSI).
- Test spray patterns on cardboard or scrap metal before painting your car.
- Look for consistent fan patterns without tails or heavy centers.
- Adjust fluid and air controls until you achieve even coverage.
Maintaining Consistent Pressure
- Monitor pressure gauges while painting – a drop of more than 10 PSI indicates an undersized compressor.
- Allow the compressor to fully recover between coats.
- Keep tank drains open slightly during operation to expel moisture.
- Never exceed 80% of your compressor’s rated duty cycle for extended periods.
Pro Tips for Better Results
- Moisture control techniques:
- Install a refrigerated air dryer for professional results
- Use copper piping instead of plastic to reduce condensation
- Slope air lines downward with drains at the lowest point
- Drain tanks daily and after each use
- Pressure adjustment strategies:
- Start with lower pressure and increase gradually until you achieve proper atomization
- Reduce pressure for metallic paints to prevent mottling
- Increase pressure slightly for high-viscosity coatings
- Record optimal settings for each paint type for future reference
- Maintenance for longevity:
- Change oil in oil-lubricated compressors every 500 hours
- Clean or replace air filters monthly
- Check belts for proper tension and wear
- Inspect safety valves and pressure switches annually
Frequently Asked Questions
Conclusion
Choosing the right size air compressor for car painting is essential for achieving professional-quality results and avoiding frustrating problems during your project. As we’ve explored, the key factors to consider are CFM requirements, tank size, and horsepower – all of which must align with your specific spray gun type and project scope.
For small panel work, a compressor delivering 5-8 CFM with a 20-gallon tank may suffice, but full car painting demands at least 10-15 CFM and a 60-gallon tank to ensure consistent performance. Professional shops should invest in 15+ CFM compressors with 80+ gallon tanks and 5+ horsepower motors for reliable, continuous operation.
Remember that CFM ratings at the correct PSI are more important than tank size or horsepower alone. Always select a compressor that exceeds your spray gun’s requirements by at least 30% to account for air system inefficiencies and ensure consistent pressure throughout your painting session.
By following the guidelines in this comprehensive guide, you’ll be well-equipped to choose the perfect air compressor for your car painting needs. Whether you’re a DIY enthusiast working on your project car or a professional auto body technician, investing in the right compressor will pay dividends in paint quality, efficiency, and overall satisfaction with your results.
Ready to find the perfect compressor for your car painting projects? Use our CFM chart and recommendations to make an informed decision that will help you achieve flawless paint finishes every time.